What is an image?
Explanation
Seeing a container is an isolated process, where does it get its files and configuration? How do you share those environments?
That's where container images come in!
A container image is a standardized package that includes all of the files, binaries, libraries, and configurations to run a container.
For a PostgreSQL image, that image will package the database binaries, config files, and other dependencies. For a Python web app, it'll include the Python runtime, your app code, and all of its dependencies.
There are two important principles of images:
Images are immutable. Once an image is created, it can't be modified. You can only make a new image or add changes on top of it.
Container images are composed of layers. Each layer represented a set of file system changes that add, remove, or modify files.
These two principles let you to extend or add to existing images. For example, if you are building a Python app, you can start from the Python image and add additional layers to install your app's dependencies and add your code. This lets you focus on your app, rather than Python itself.
Finding images
Docker Hub is the default global marketplace for storing and distributing images. It has over 100,000 images created by developers that you can run locally. You can search for Docker Hub images and run them directly from Docker Desktop.
Docker Hub provides a variety of Docker-supported and endorsed images known as Docker Trusted Content. These provide fully managed services or great starters for your own images. These include:
- Docker Official Images - a curated set of Docker repositories, serve as the starting point for the majority of users, and are some of the most secure on Docker Hub
- Docker Verified Publishers - high-quality images from commercial publishers verified by Docker
- Docker-Sponsored Open Source - images published and maintained by open-source projects sponsored by Docker through Docker's open source program
For example, Redis and Memcached are a few popular ready-to-go Docker Official Images. You can download these images and have these services up and running in a matter of seconds. There are also base images, like the Node.js Docker image, that you can use as a starting point and add your own files and configurations.
Try it now
In this hands-on, you will learn how to search and pull a container image using the Docker Desktop GUI.
Search for and download an image
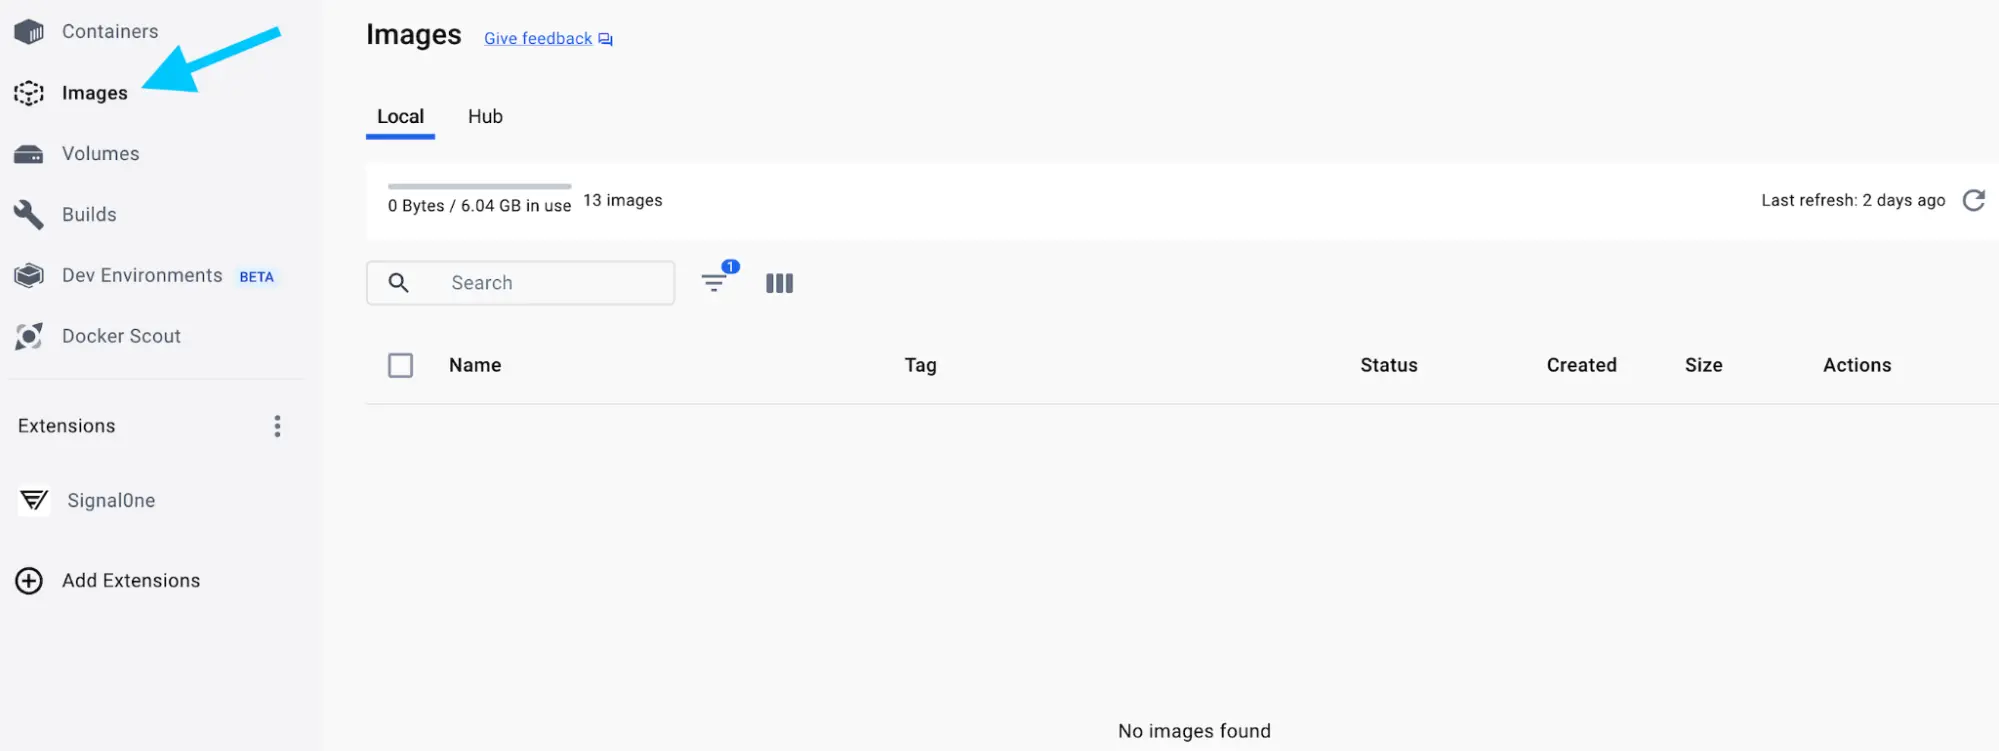
Open the Docker Dashboard and select the Images view in the left-hand navigation menu.
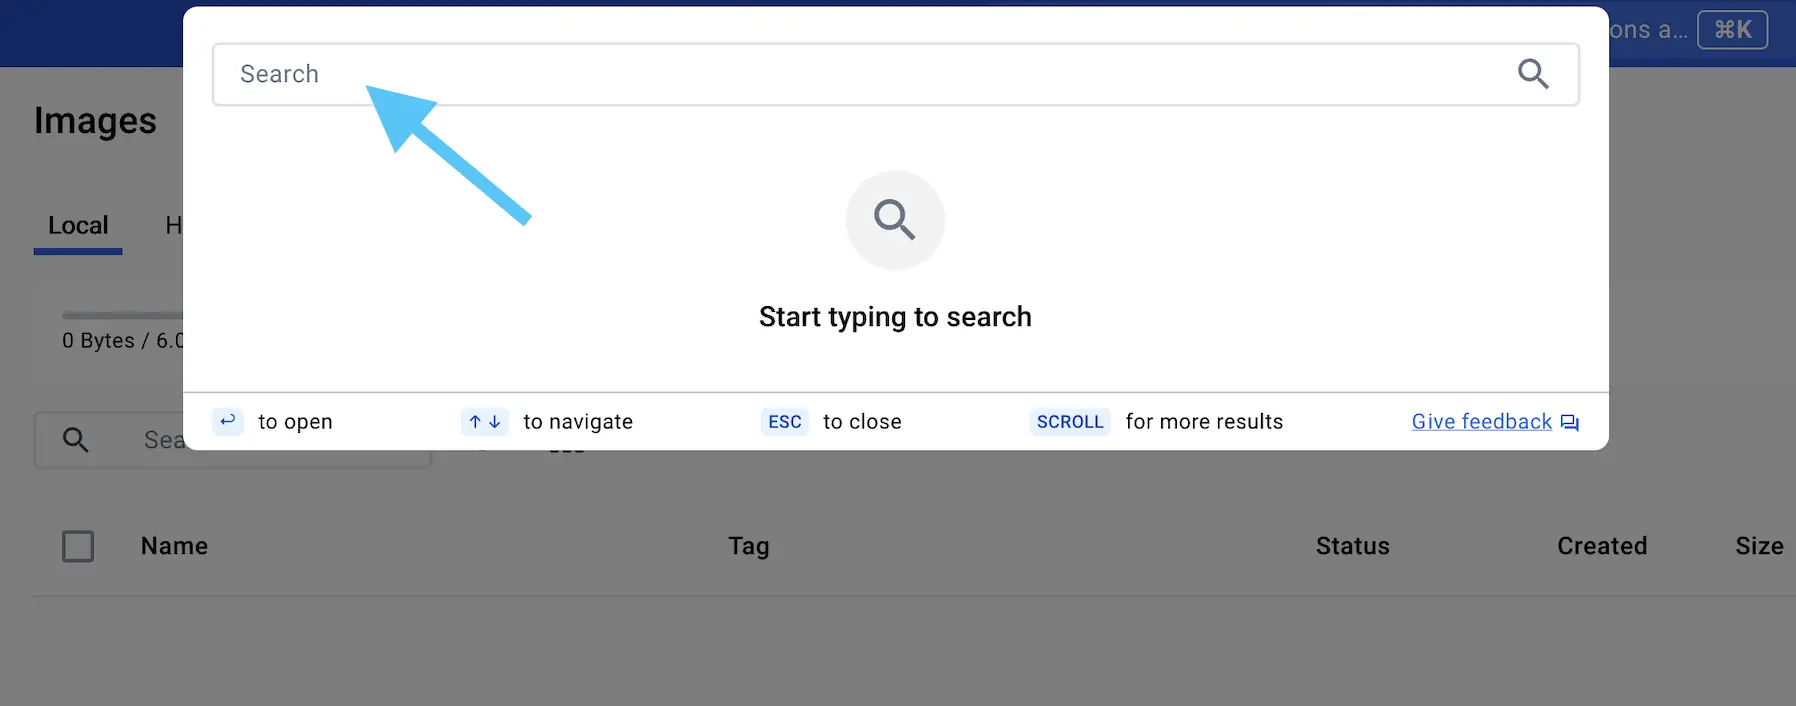
Select the Search images to run button. If you don't see it, select the global search bar at the top of the screen.
In the Search field, enter "welcome-to-docker". Once the search has completed, select the
docker/welcome-to-dockerimage.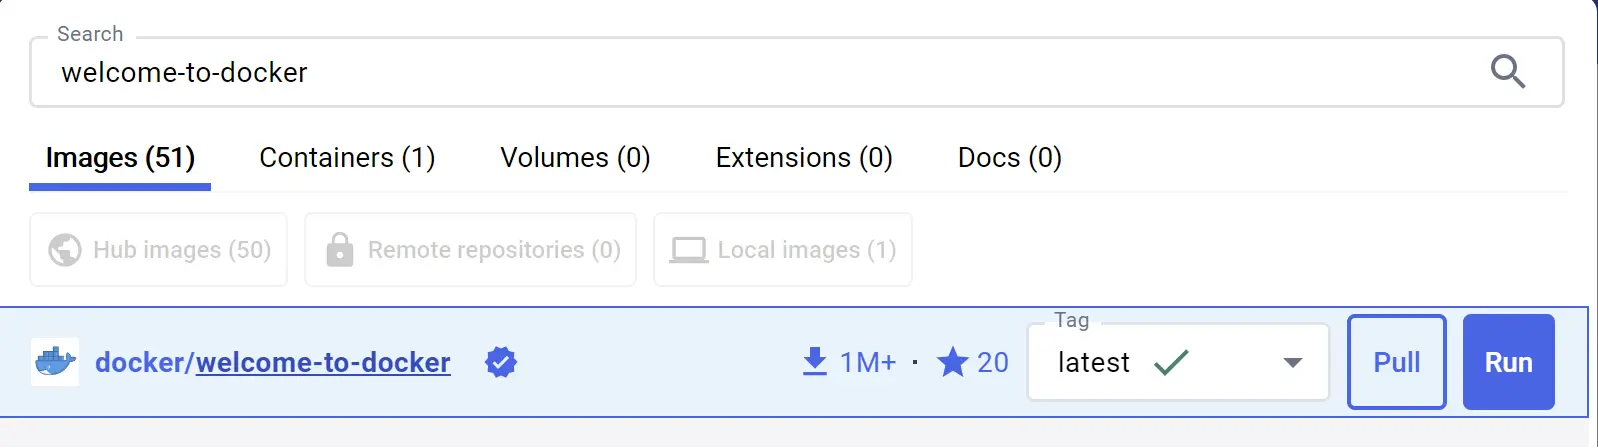
Select Pull to download the image.
Learn about the image
Once you have an image downloaded, you can learn quite a few details about the image either through the GUI or the CLI.
In the Docker Dashboard, select the Images view.
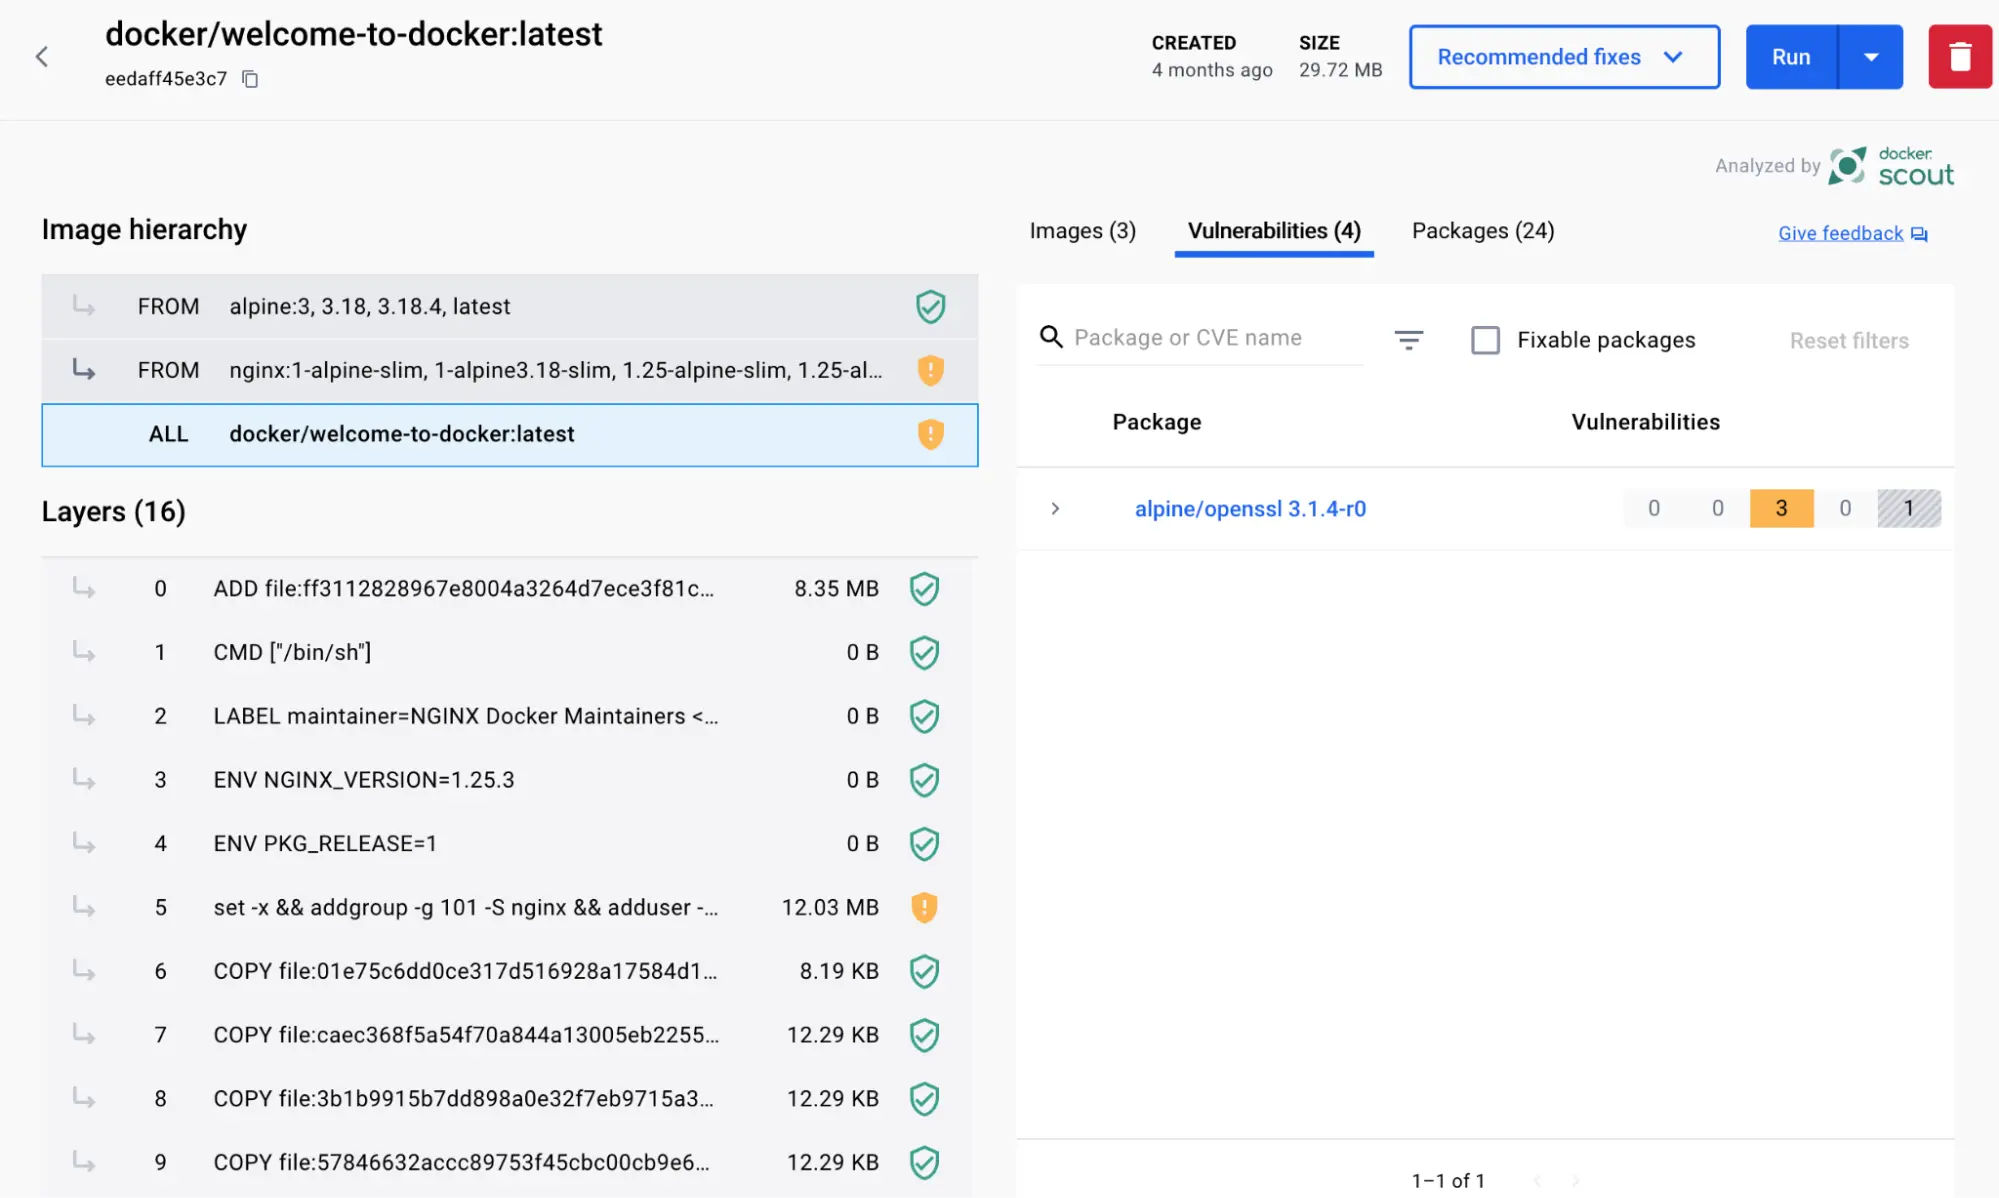
Select the docker/welcome-to-docker image to open details about the image.
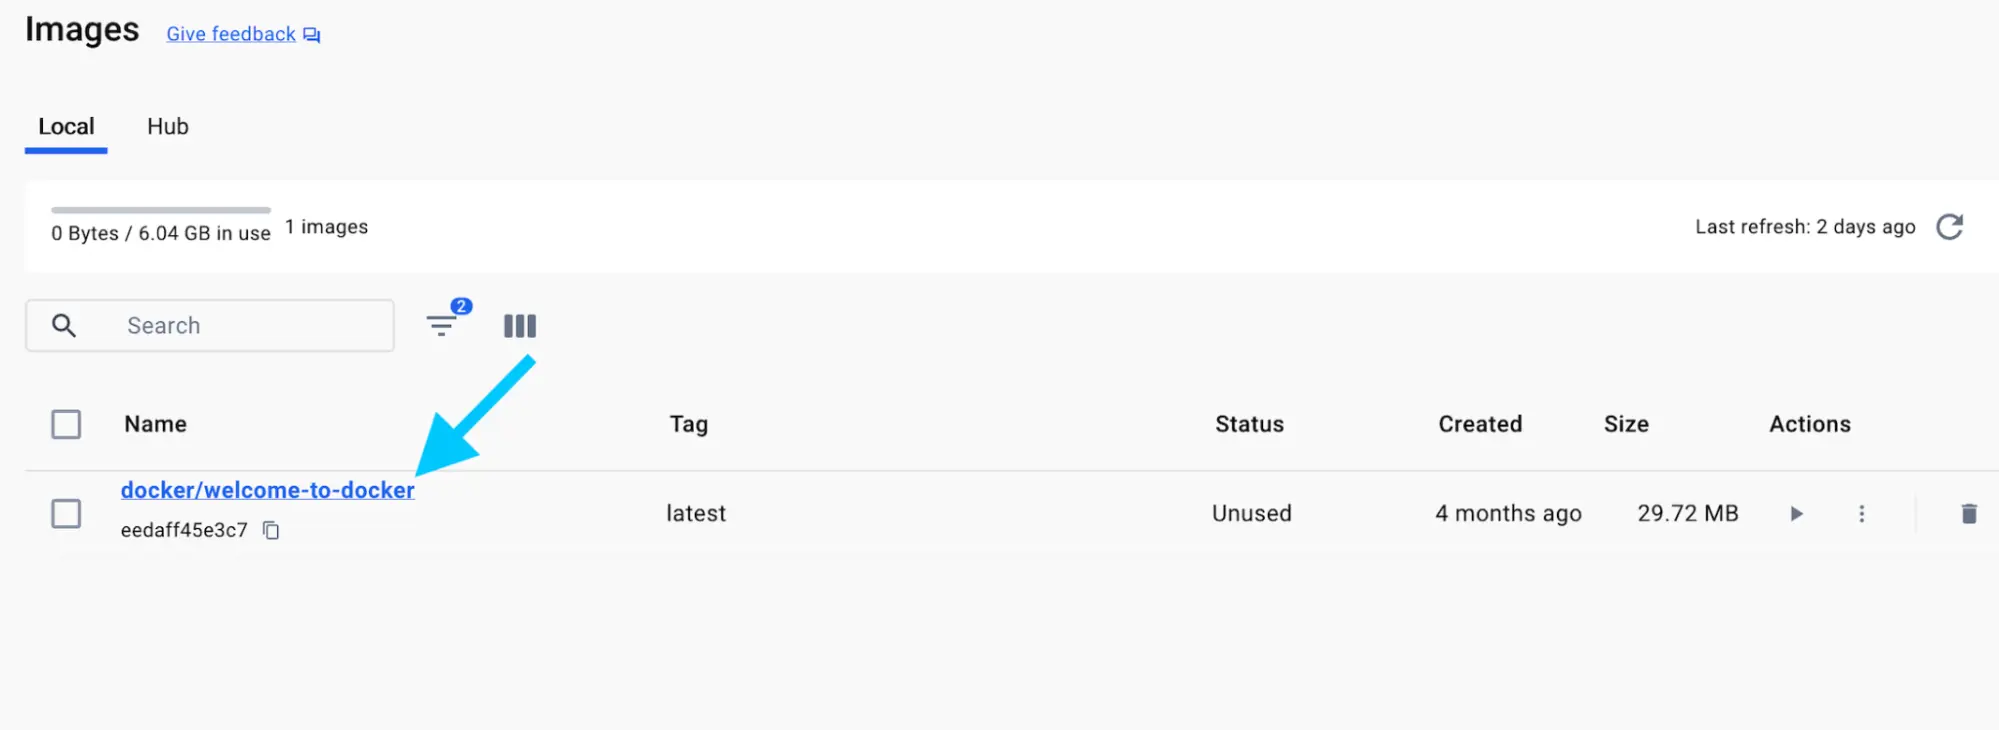
The image details page presents you with information regarding the layers of the image, the packages and libraries installed in the image, and any discovered vulnerabilities.
Follow the instructions to search and pull a Docker image using CLI to view its layers.
Search for and download an image
Open a terminal and search for images using the
docker searchcommand:docker search docker/welcome-to-dockerYou will see output like the following:
NAME                       DESCRIPTION                                     STARS     OFFICIAL
docker/welcome-to-docker   Docker image for new users getting started w…   20
This output shows you information about relevant images available on Docker Hub.
Pull the image using the
docker pullcommand.docker pull docker/welcome-to-dockerYou will see output like the following:
Using default tag: latest
latest: Pulling from docker/welcome-to-docker
579b34f0a95b: Download complete
d11a451e6399: Download complete
1c2214f9937c: Download complete
b42a2f288f4d: Download complete
54b19e12c655: Download complete
1fb28e078240: Download complete
94be7e780731: Download complete
89578ce72c35: Download complete
Digest: sha256:eedaff45e3c78538087bdd9dc7afafac7e110061bbdd836af4104b10f10ab693
Status: Downloaded newer image for docker/welcome-to-docker:latest
docker.io/docker/welcome-to-docker:latest
Each of line represents a different downloaded layer of the image. Remember that each layer is a set of filesystem changes and provides functionality of the image.
Learn about the image
List your downloaded images using the
docker image lscommand:docker image lsYou will see output like the following:
REPOSITORY                 TAG       IMAGE ID       CREATED        SIZE
docker/welcome-to-docker   latest    eedaff45e3c7   4 months ago   29.7MB
The command shows a list of Docker images currently available on your system. The
docker/welcome-to-dockerhas a total size of approximately 29.7MB.Image size
The image size represented here reflects the uncompressed size of the image, not the download size of the layers.
List the image's layers using the
docker image historycommand:docker image history docker/welcome-to-dockerYou will see output like the following:
IMAGE          CREATED        CREATED BY                                      SIZE      COMMENT
648f93a1ba7d   4 months ago   COPY /app/build /usr/share/nginx/html # buil…   1.6MB     buildkit.dockerfile.v0
<missing>      5 months ago   /bin/sh -c #(nop)  CMD ["nginx" "-g" "daemon…   0B
<missing>      5 months ago   /bin/sh -c #(nop)  STOPSIGNAL SIGQUIT           0B
<missing>      5 months ago   /bin/sh -c #(nop)  EXPOSE 80                    0B
<missing>      5 months ago   /bin/sh -c #(nop)  ENTRYPOINT ["/docker-entr…   0B
<missing>      5 months ago   /bin/sh -c #(nop) COPY file:9e3b2b63db9f8fc7…   4.62kB
<missing>      5 months ago   /bin/sh -c #(nop) COPY file:57846632accc8975…   3.02kB
<missing>      5 months ago   /bin/sh -c #(nop) COPY file:3b1b9915b7dd898a…   298B
<missing>      5 months ago   /bin/sh -c #(nop) COPY file:caec368f5a54f70a…   2.12kB
<missing>      5 months ago   /bin/sh -c #(nop) COPY file:01e75c6dd0ce317d…   1.62kB
<missing>      5 months ago   /bin/sh -c set -x     && addgroup -g 101 -S …   9.7MB
<missing>      5 months ago   /bin/sh -c #(nop)  ENV PKG_RELEASE=1            0B
<missing>      5 months ago   /bin/sh -c #(nop)  ENV NGINX_VERSION=1.25.3     0B
<missing>      5 months ago   /bin/sh -c #(nop)  LABEL maintainer=NGINX Do…   0B
<missing>      5 months ago   /bin/sh -c #(nop)  CMD ["/bin/sh"]              0B
<missing>      5 months ago   /bin/sh -c #(nop) ADD file:ff3112828967e8004…   7.66MB
This output shows you all of the layers, their sizes, and the command used to create the layer.
Viewing the full command
If you add the
--no-truncflag to the command, you will see the full command. Note that, since the output is in a table-like format, longer commands will cause the output to be very difficult to navigate.
In this walkthrough, you searched and pulled a Docker image. In addition to pulling a Docker image, you also learned about the layers of a Docker Image.
Additional resources
The following resources will help you learn more about exploring, finding, and building images:
Next steps
Now that you have learned the basics of images, it's time to learn about distributing images through registries.